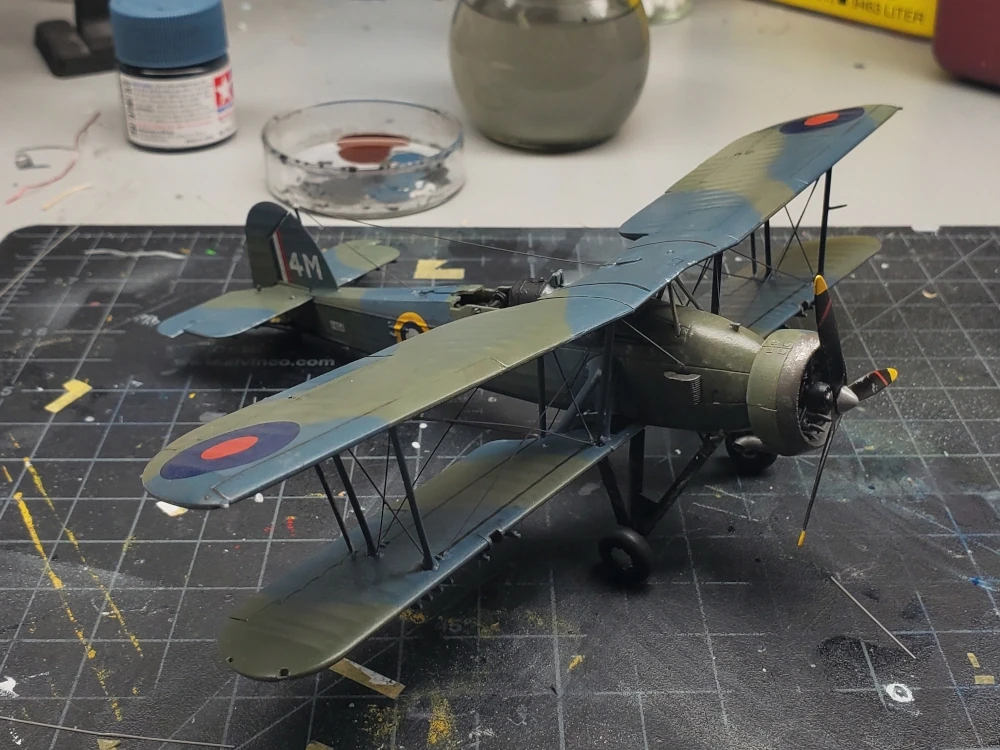
The Fairey Swordfish is a torpedo bomber that served for the Royal Airforce for the duration of the Second World War. Even though being obsolete, it still saw use as a torpedo bomber and later on used as an anti-submarine plane. Building this Fairey Swordfish was an excerise in careful rigging of all the bracing. The final model also was painted with a camoflague color scheme, which was also a technique challenge.
Parts
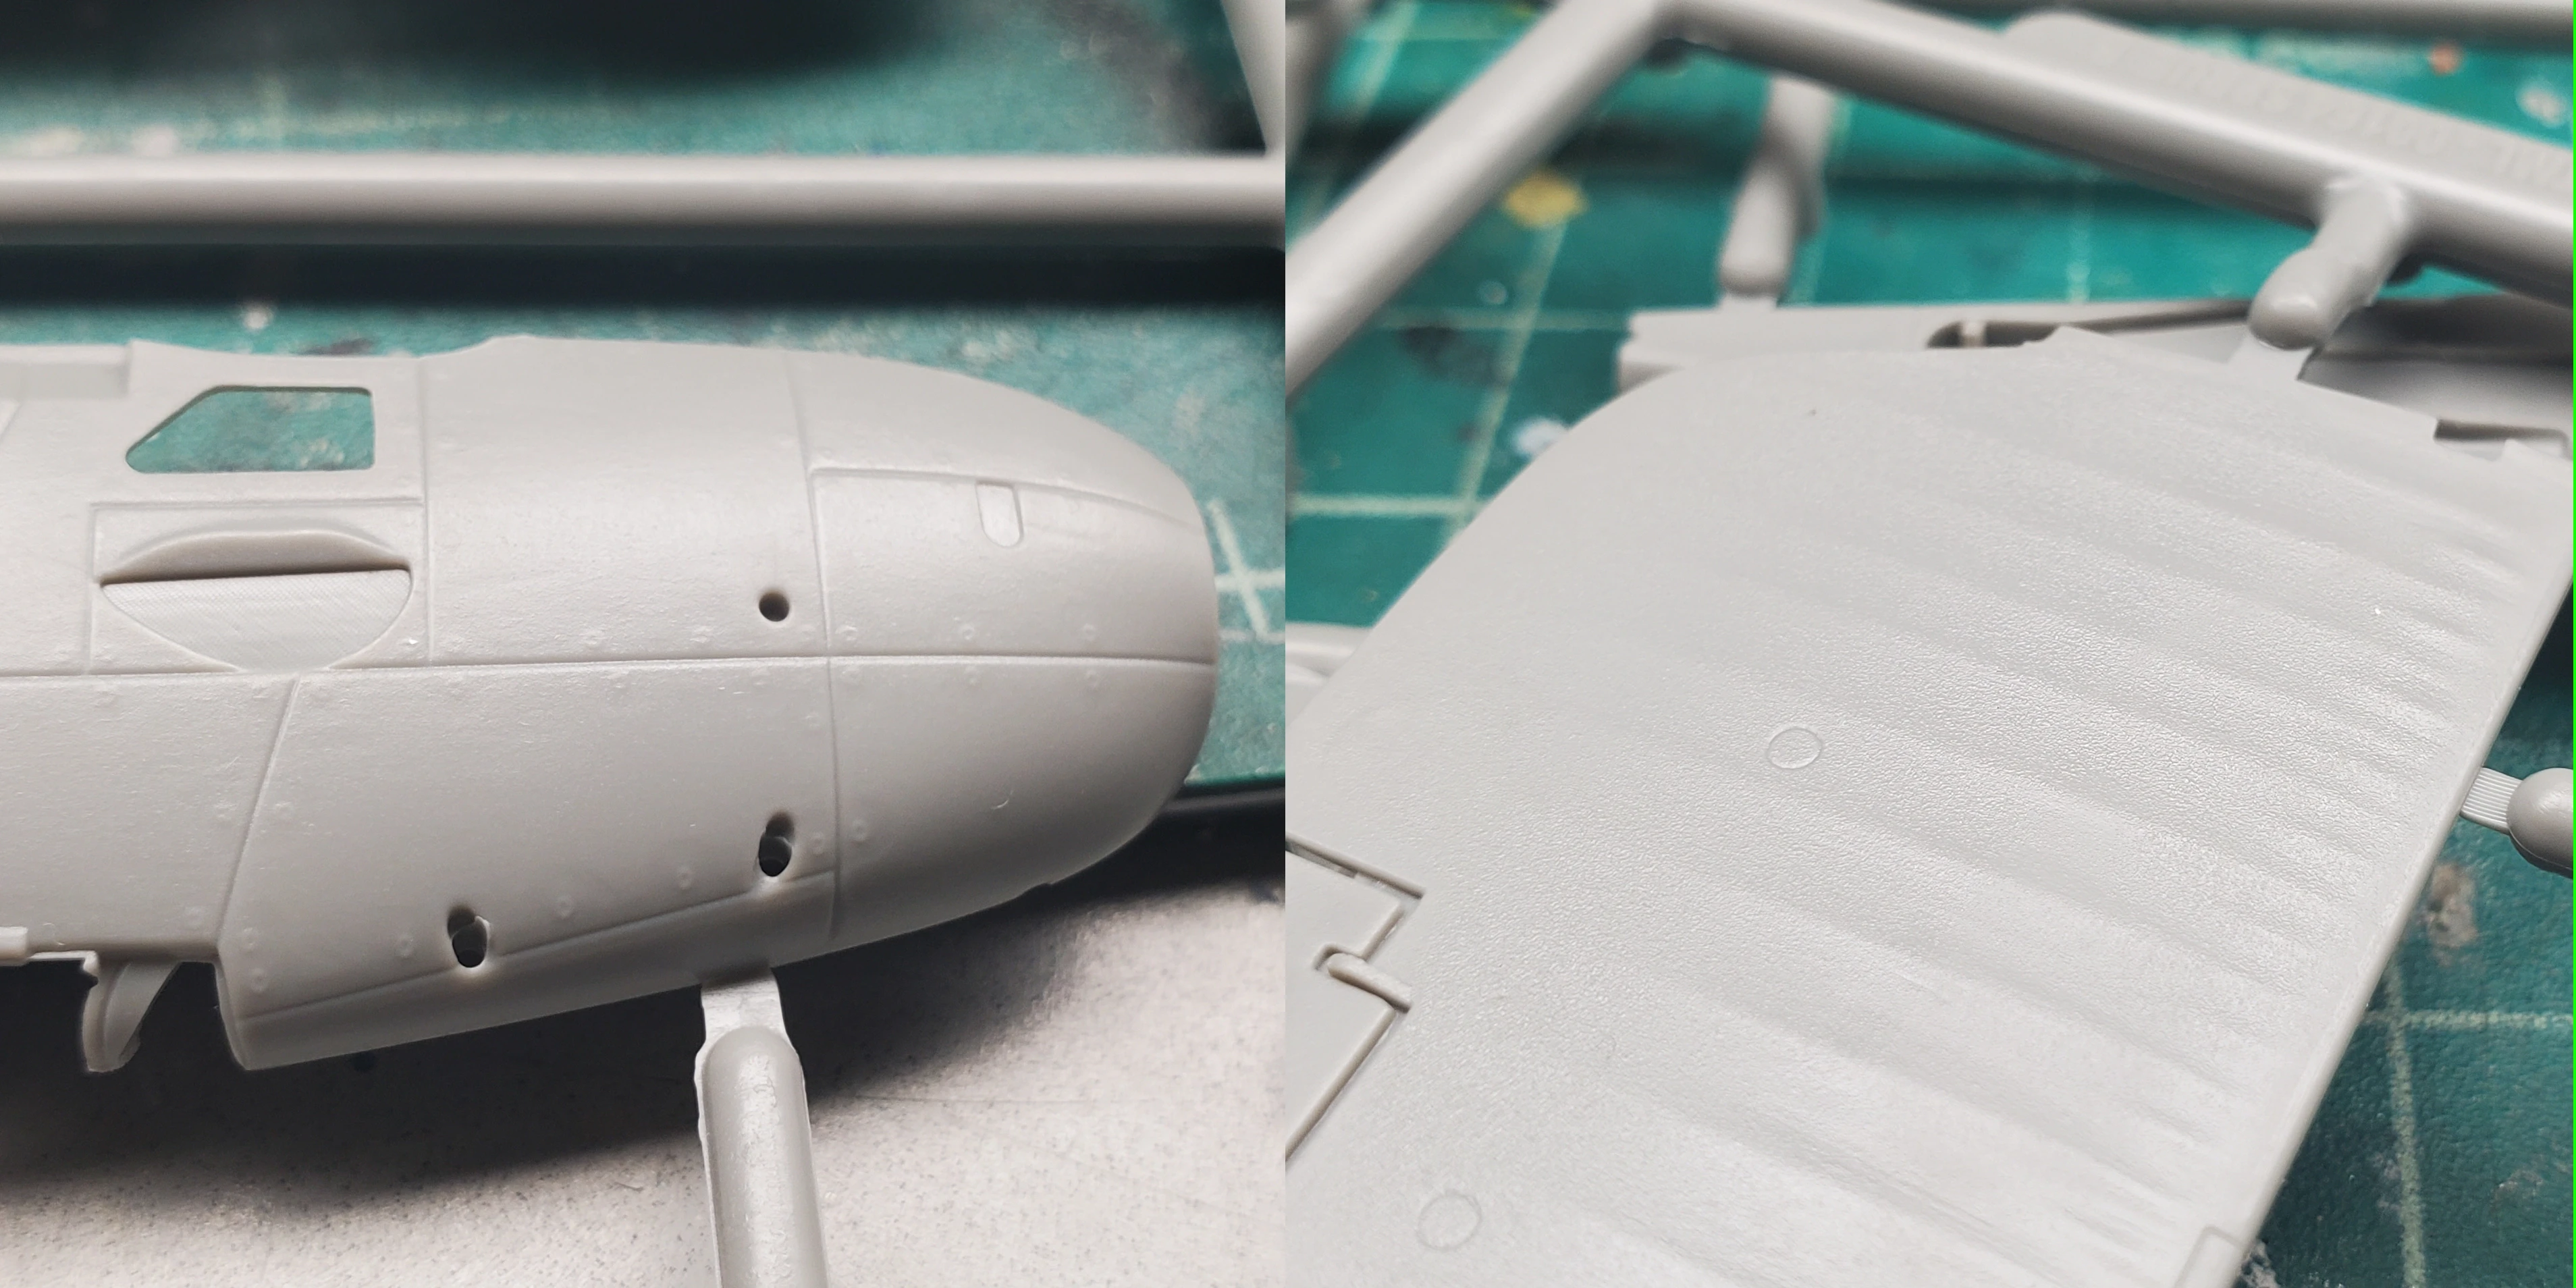
I bought this kit for only around 25 dollars. For a 1/72 scale plane, this seems to be an appropriate price. This box art depicts the Fairey Swordfish Mk.I with the “No.825 Naval Air Squadron, Fleed Air Arm, HMS Glorious, 1939” color scheme, with its striking yellow stripes. In the box, there are 4 sprues marked A-E (with the E sprue being clear plastic) and a decal sheet. The texture on the parts were varied, and was a decent representation of the material on the real aircraft. A good example of this are the wings, which are molded to look like fabric.
The instructions suggested washing off all the parts with warm, soapy water. I was never instructed to do this on any other model, but I still did it due to fear of any interference with the paint.
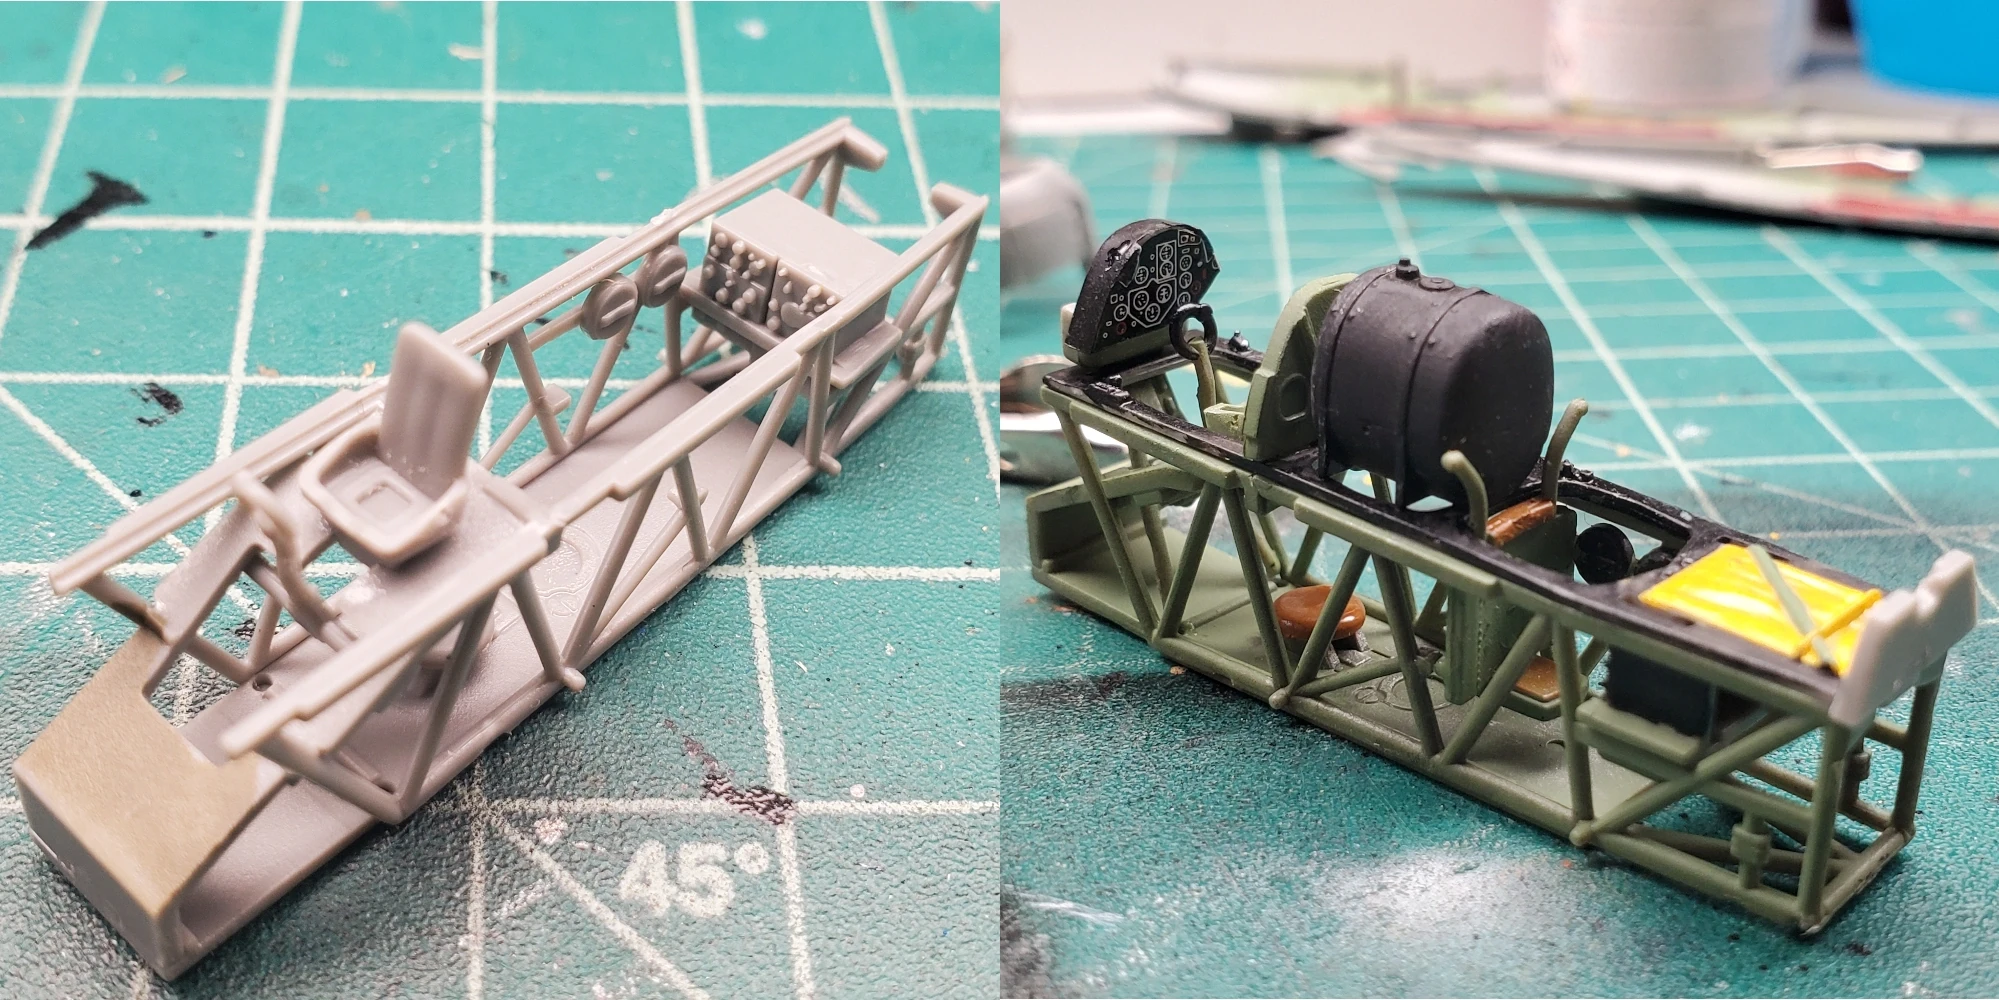
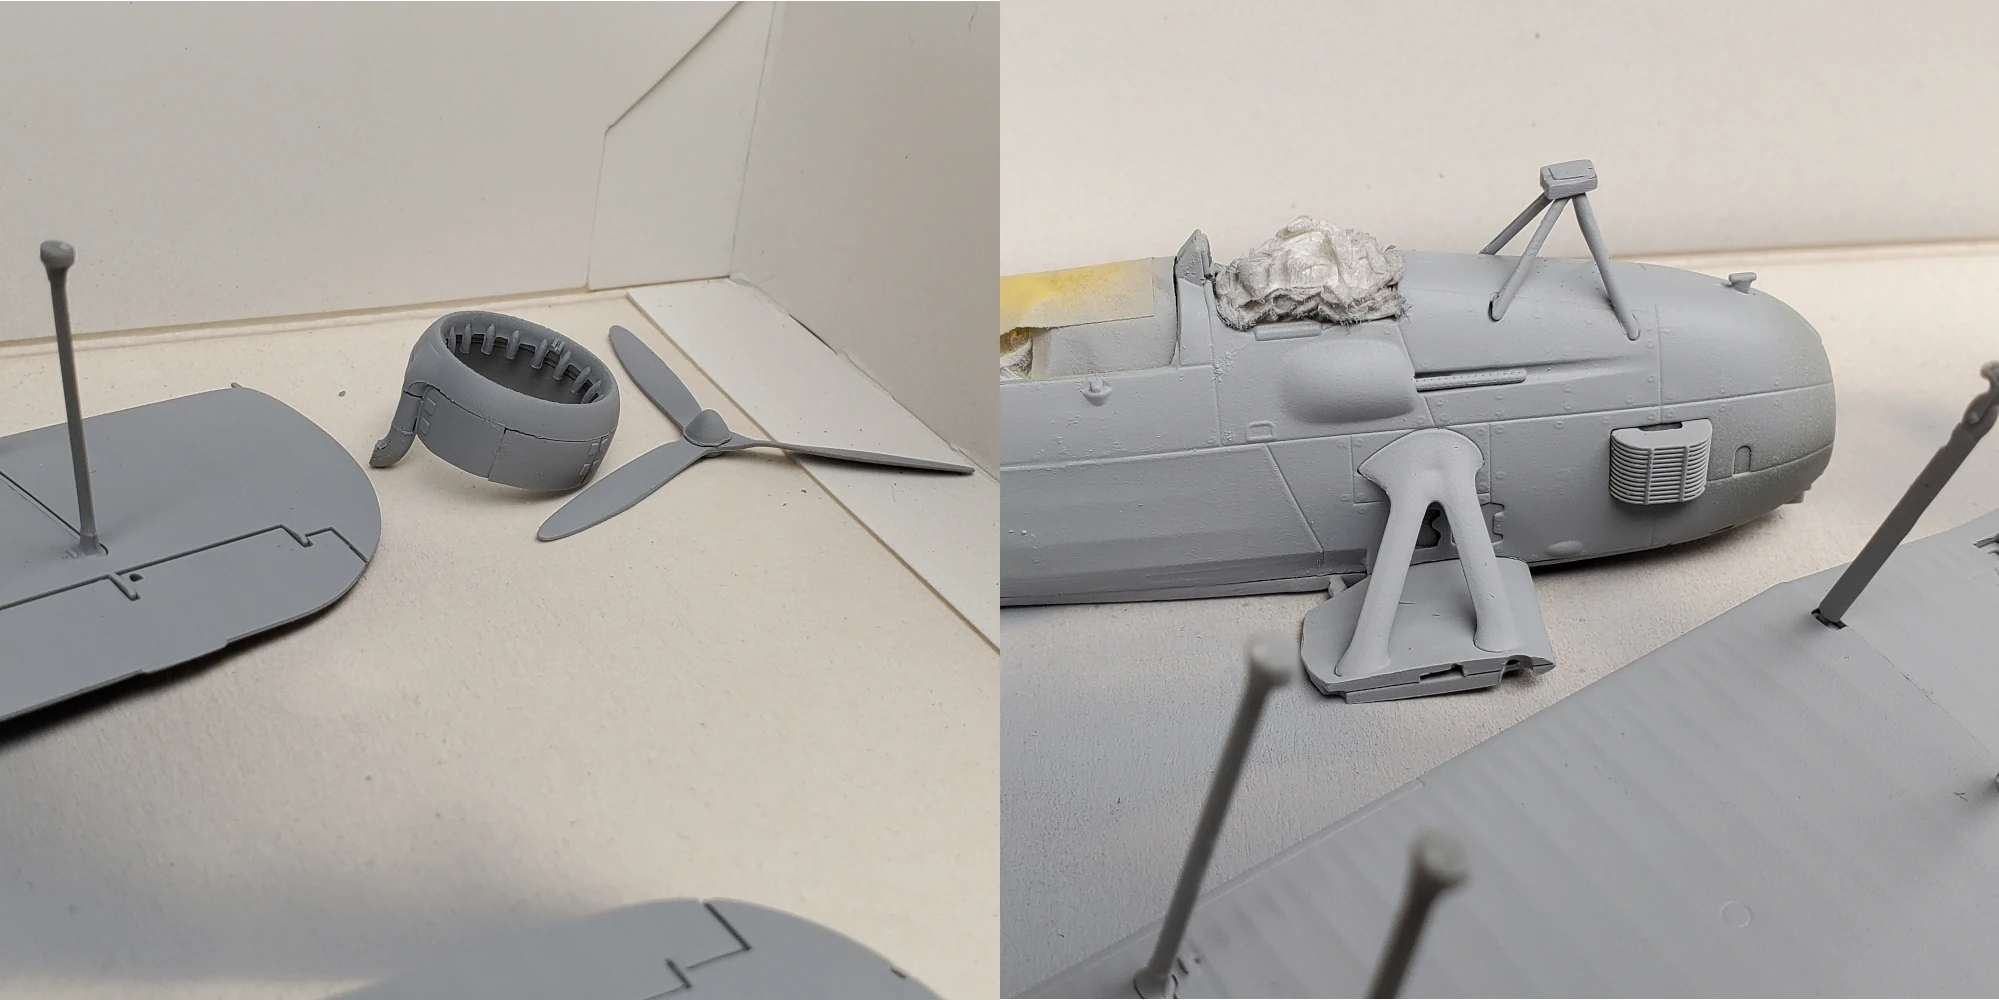
The cockpit built into quite a complex little construction. After everything was built, it was painted with XF-71, Cockpit Green. The sides of the interior were supposed to be painted with Humbrol 61: Flesh. The Tamiya equivalent seemed to be a bit too light compared to images online, so I added some Red: X-7 to Flat Flesh: XF-15. Doesn’t look quite right, but I think it’s fine.
Paint
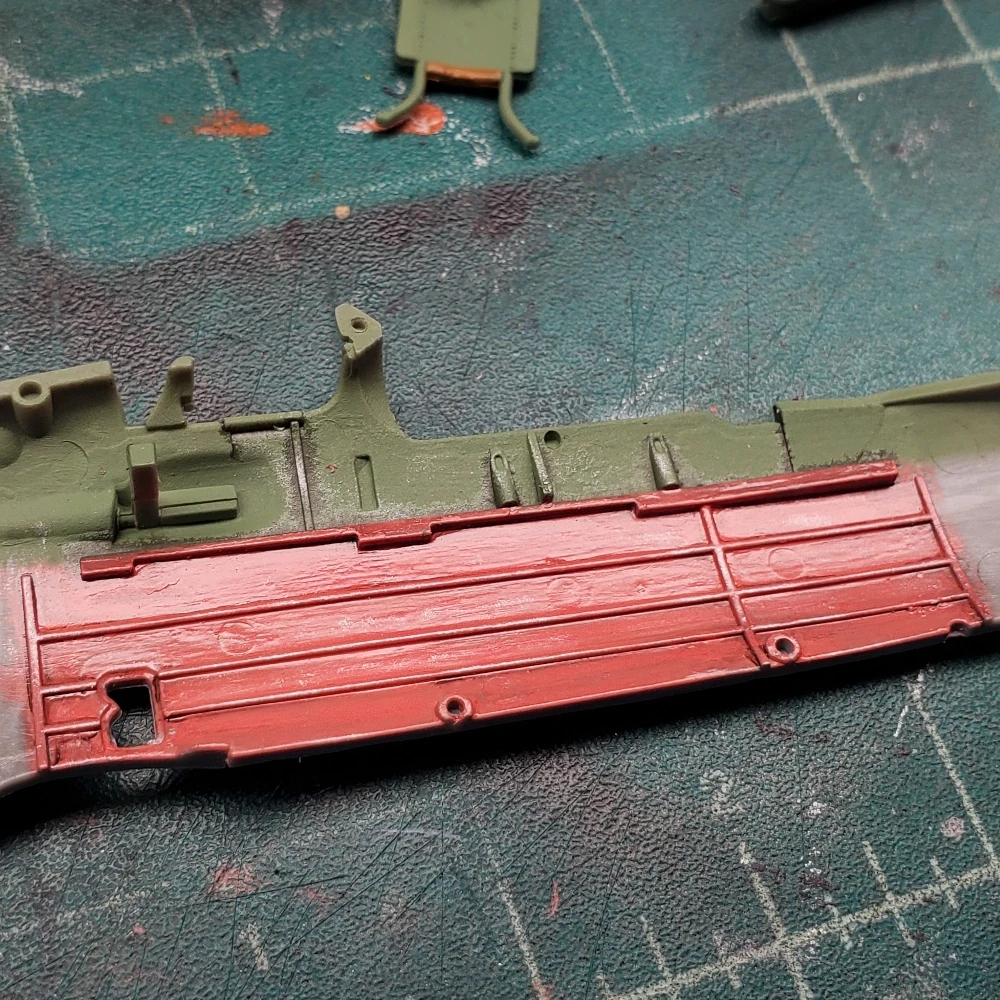
A coat of Mr.Surfacer 1000 gray was applied to the whole model thinned with generic hardware store thinner.
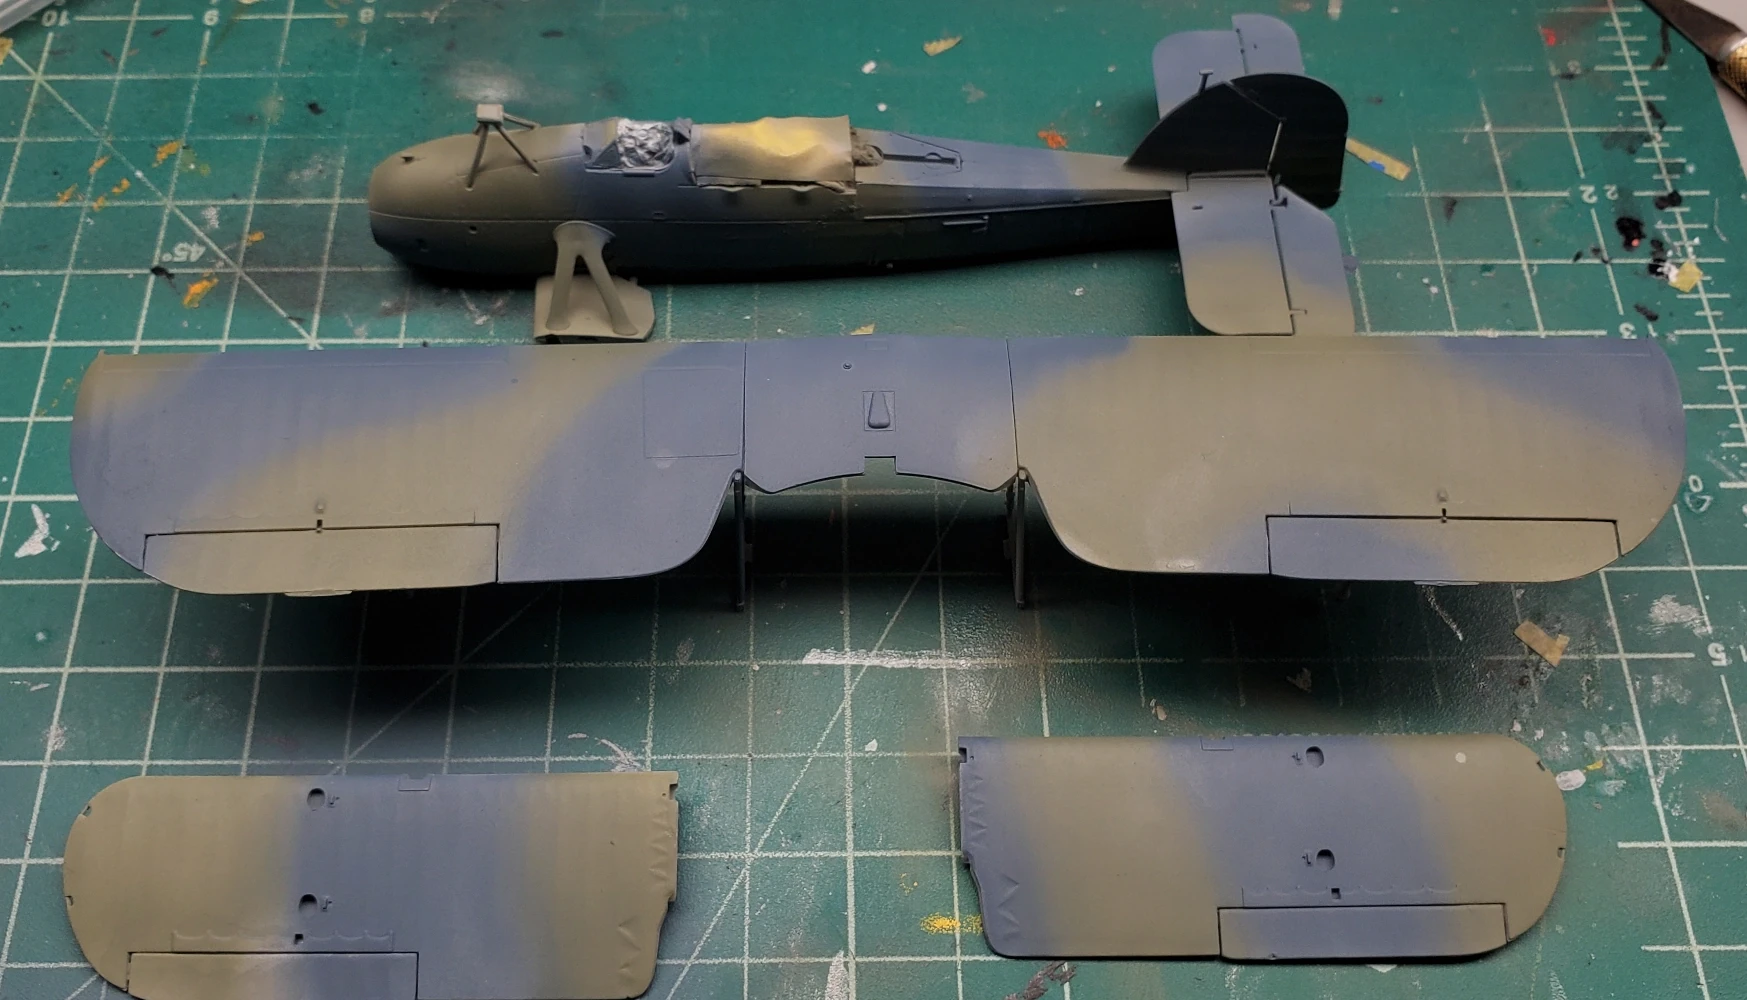
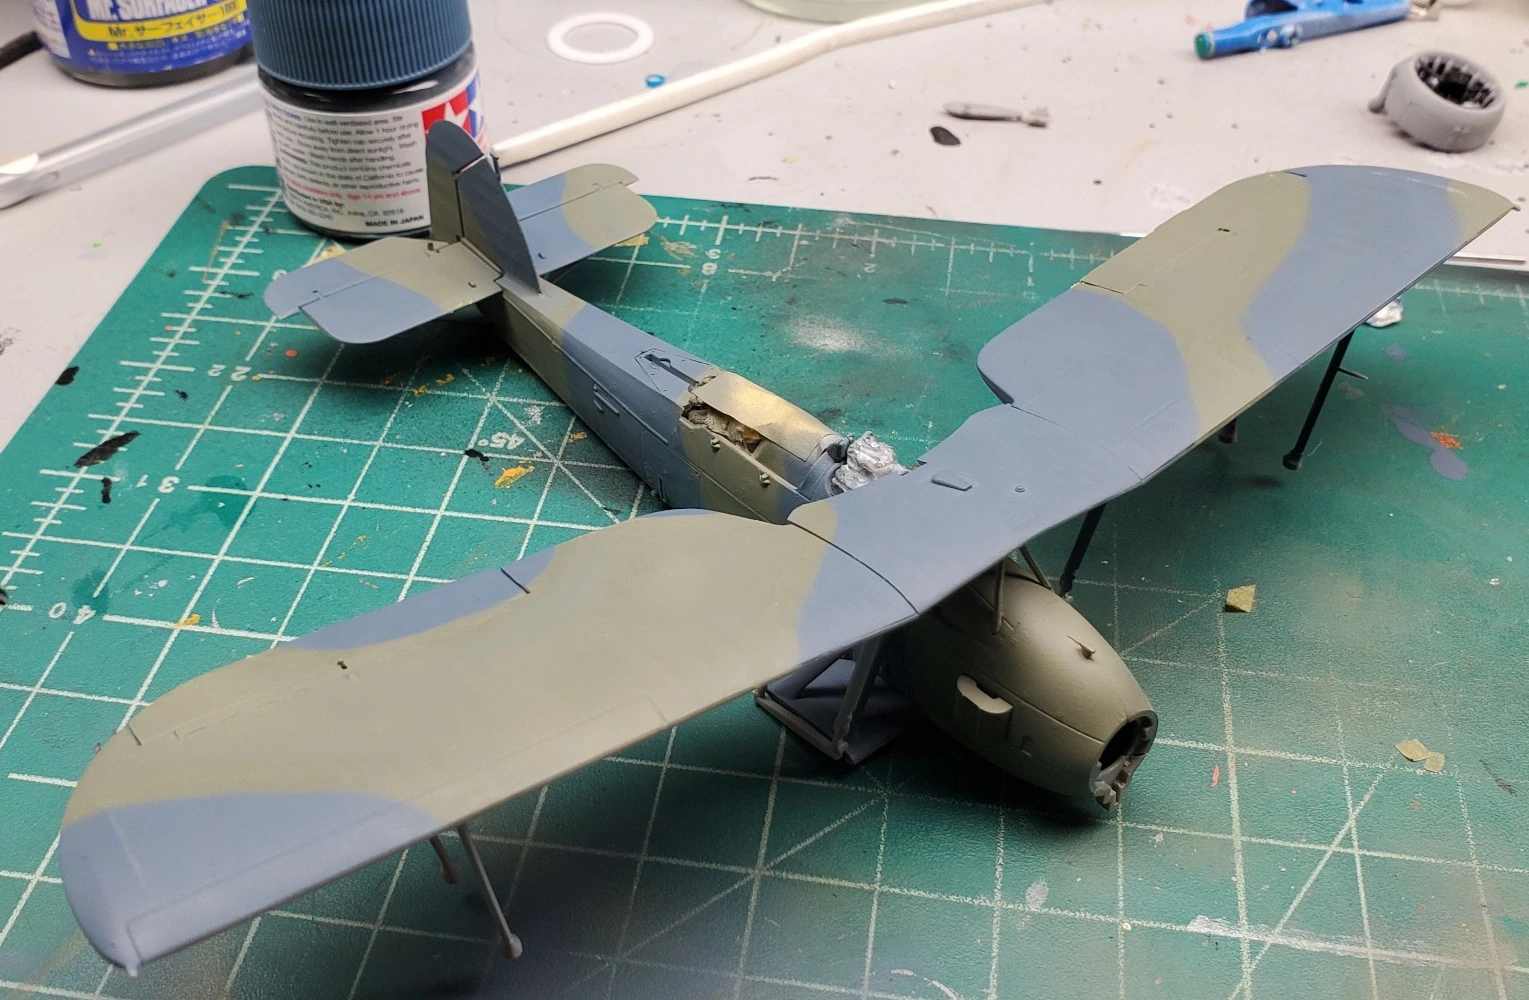
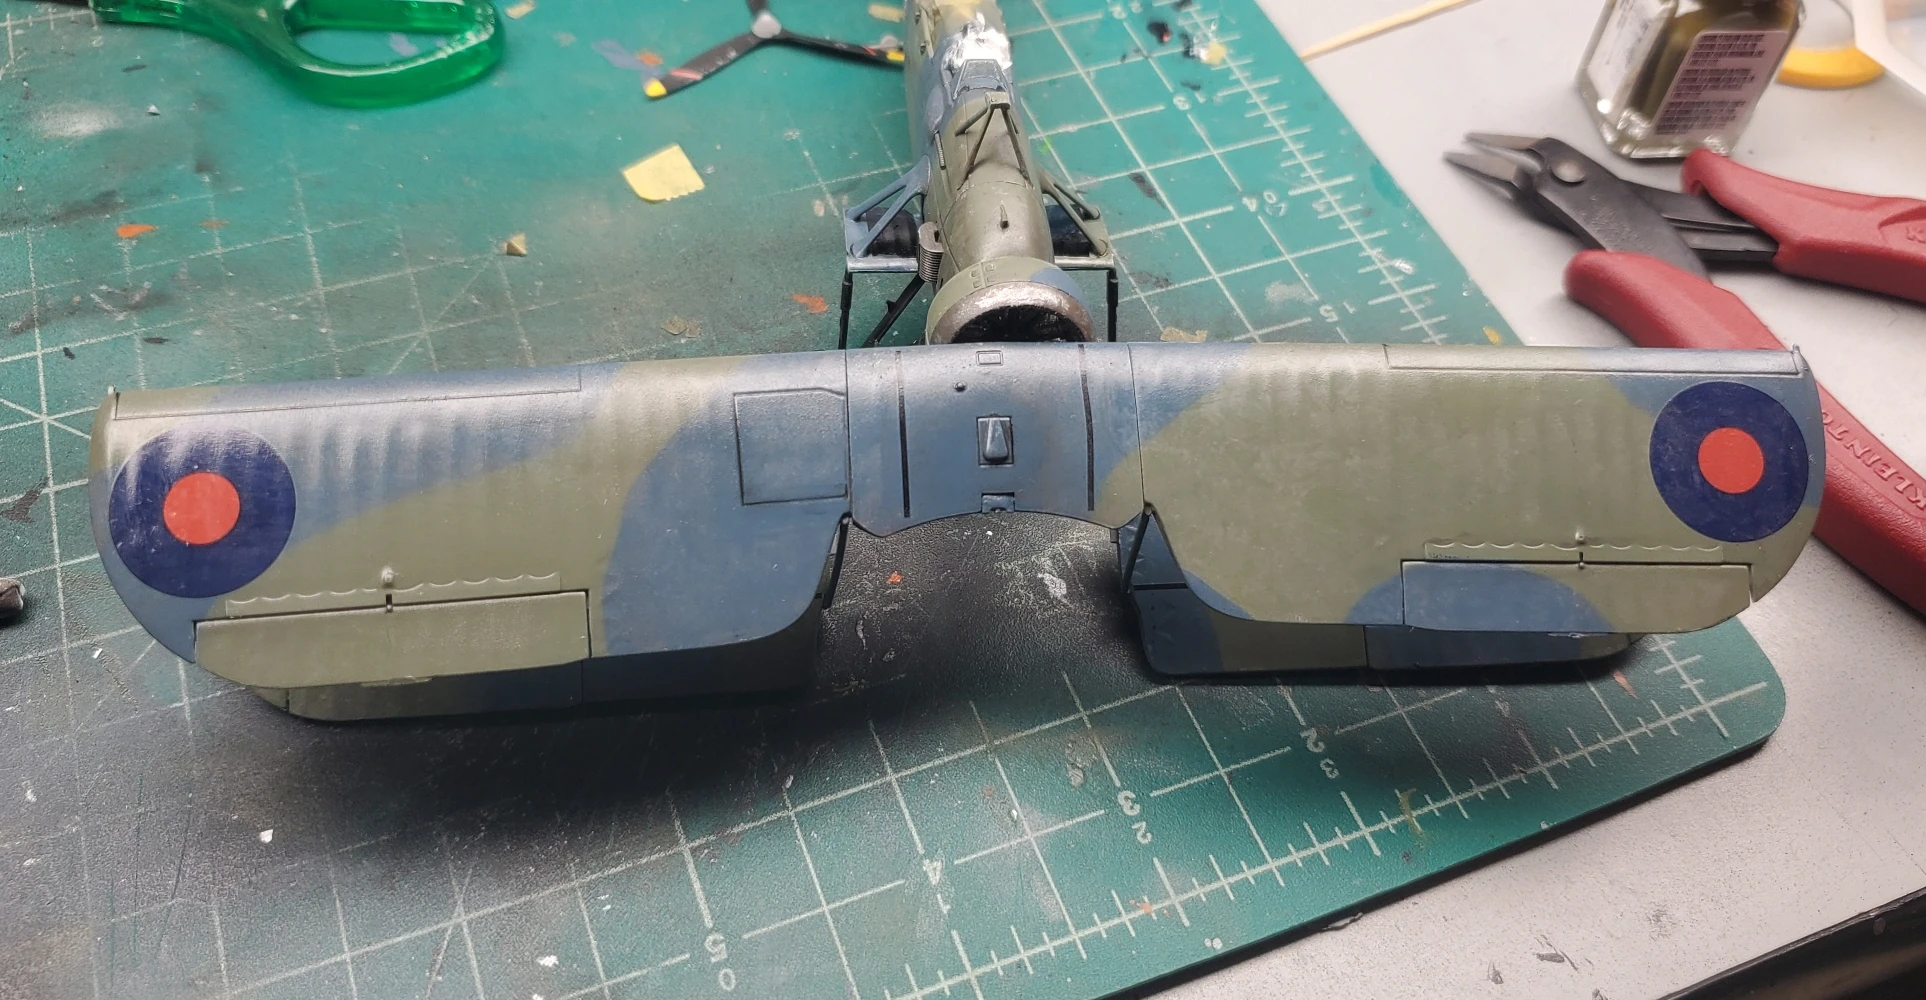
For this model, I chose the “B” Color scheme, which is a blue and green camoflague pattern. One challenge was the paint colors in the instructions simply beling numbers. These numbers represent humbrol paint codes. Due to me not being able to obtain humbrol colors and tamiya colors being more available in my area, I needed to decode the paint colors. I would either look up the humbrol color and go by its paint name or look at a online conversian chart for a close match. The paints I used were:
- Cockpit Green: XF-71
- Medium Blue: XF-18
- Olive Drab (JGSDF): XF-74
- Black: XF-1
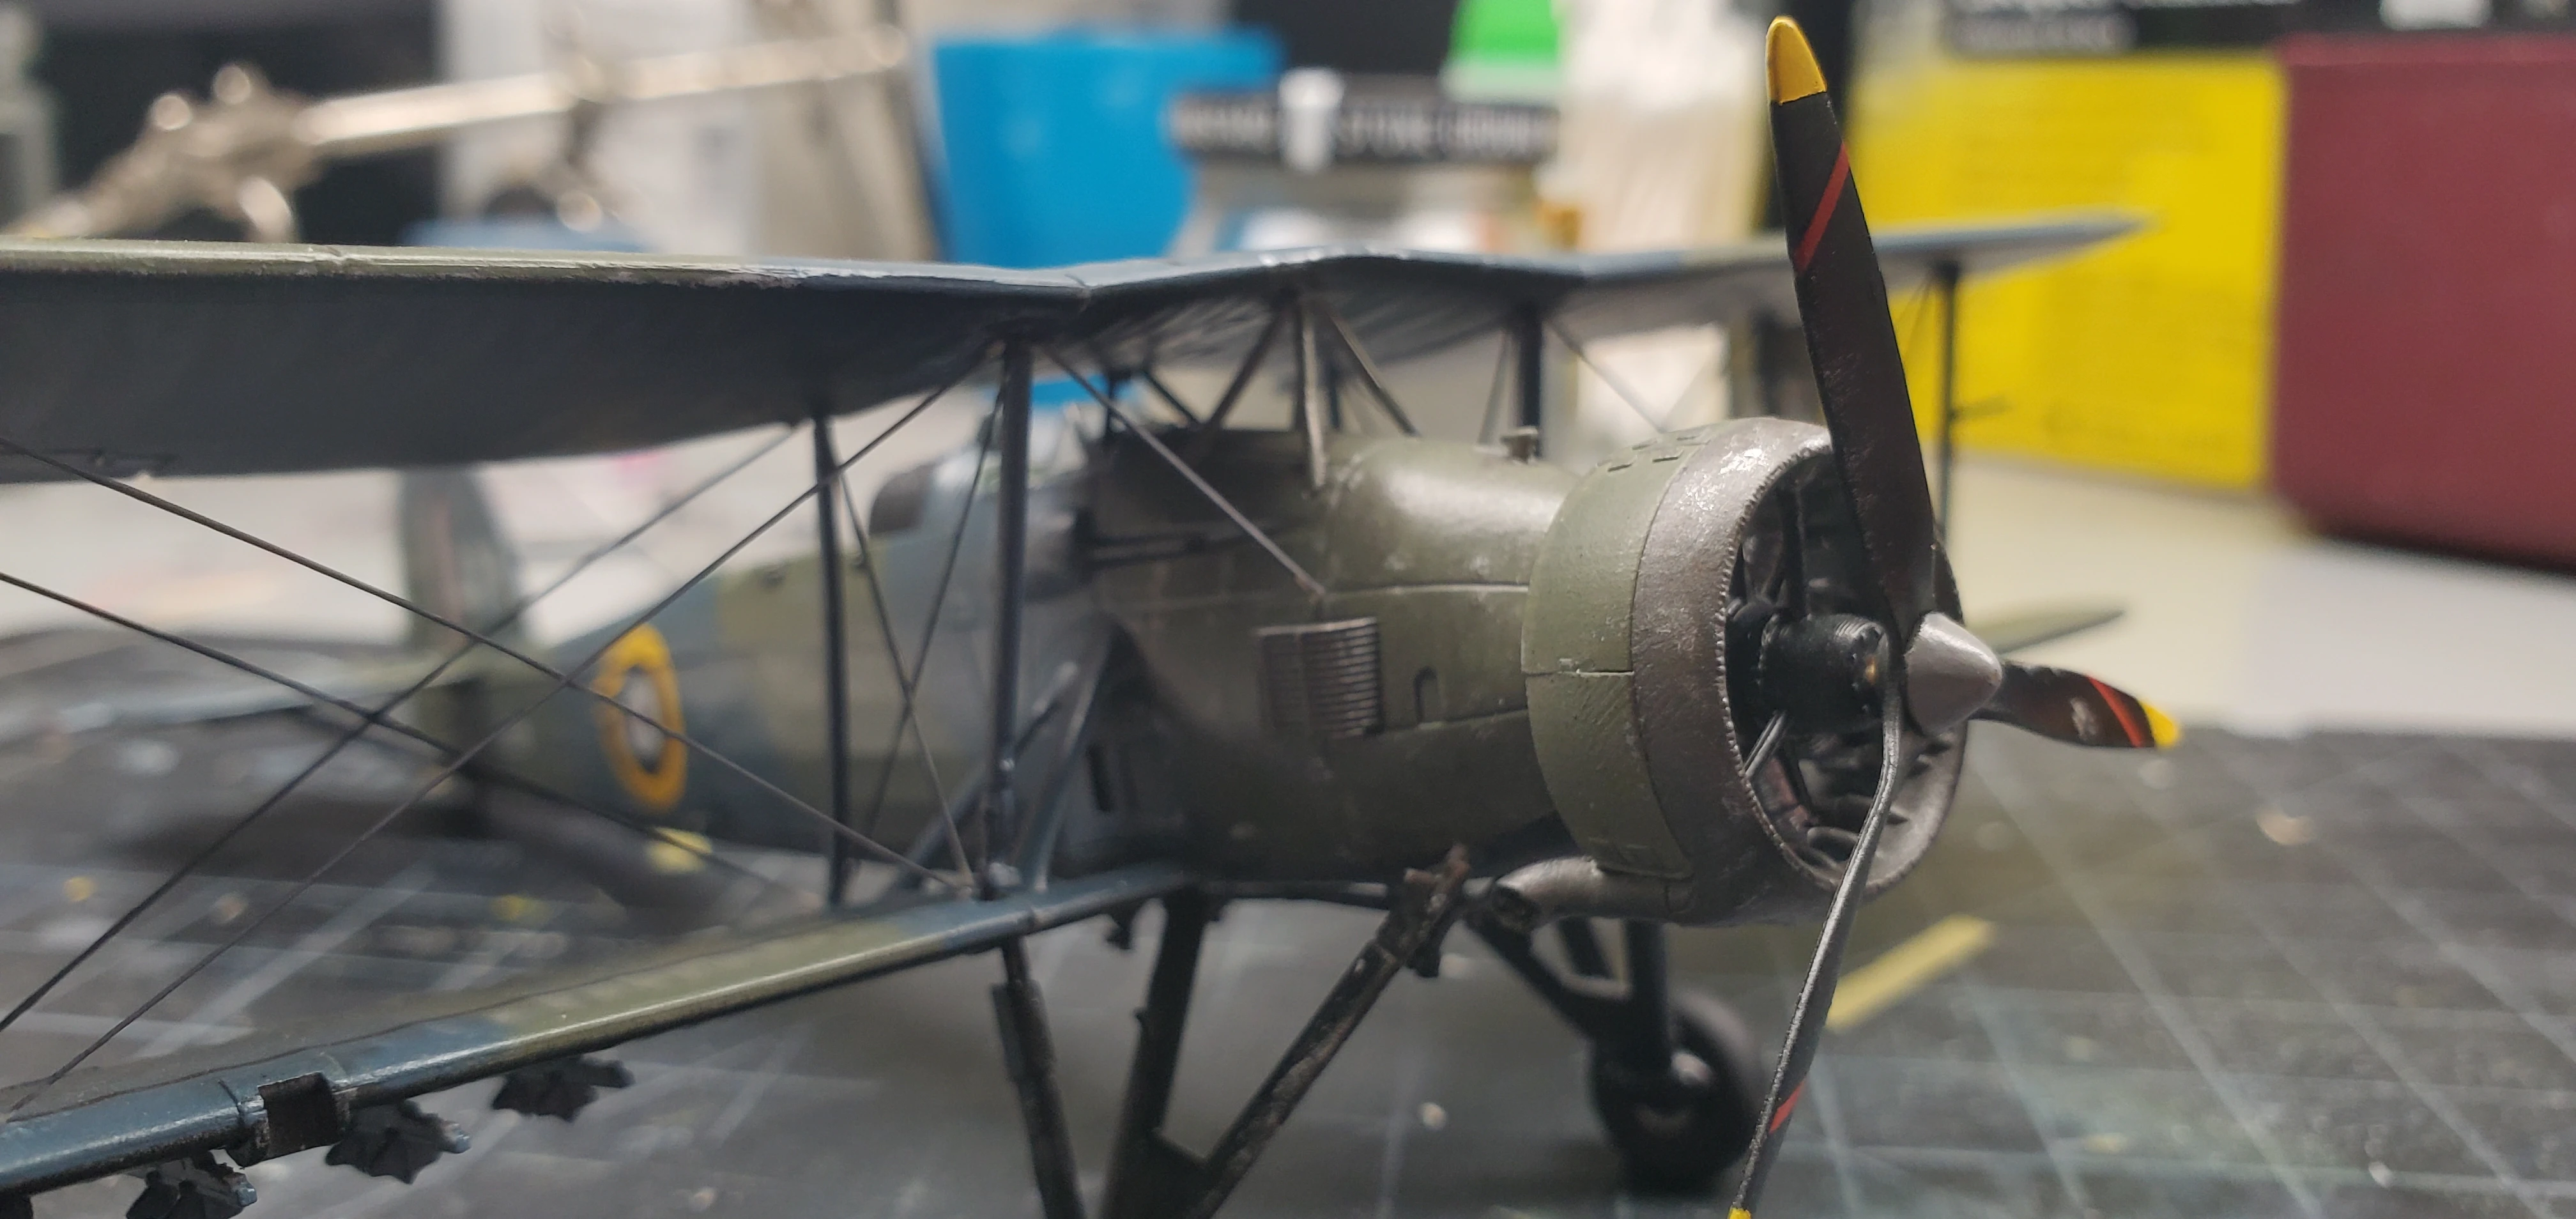
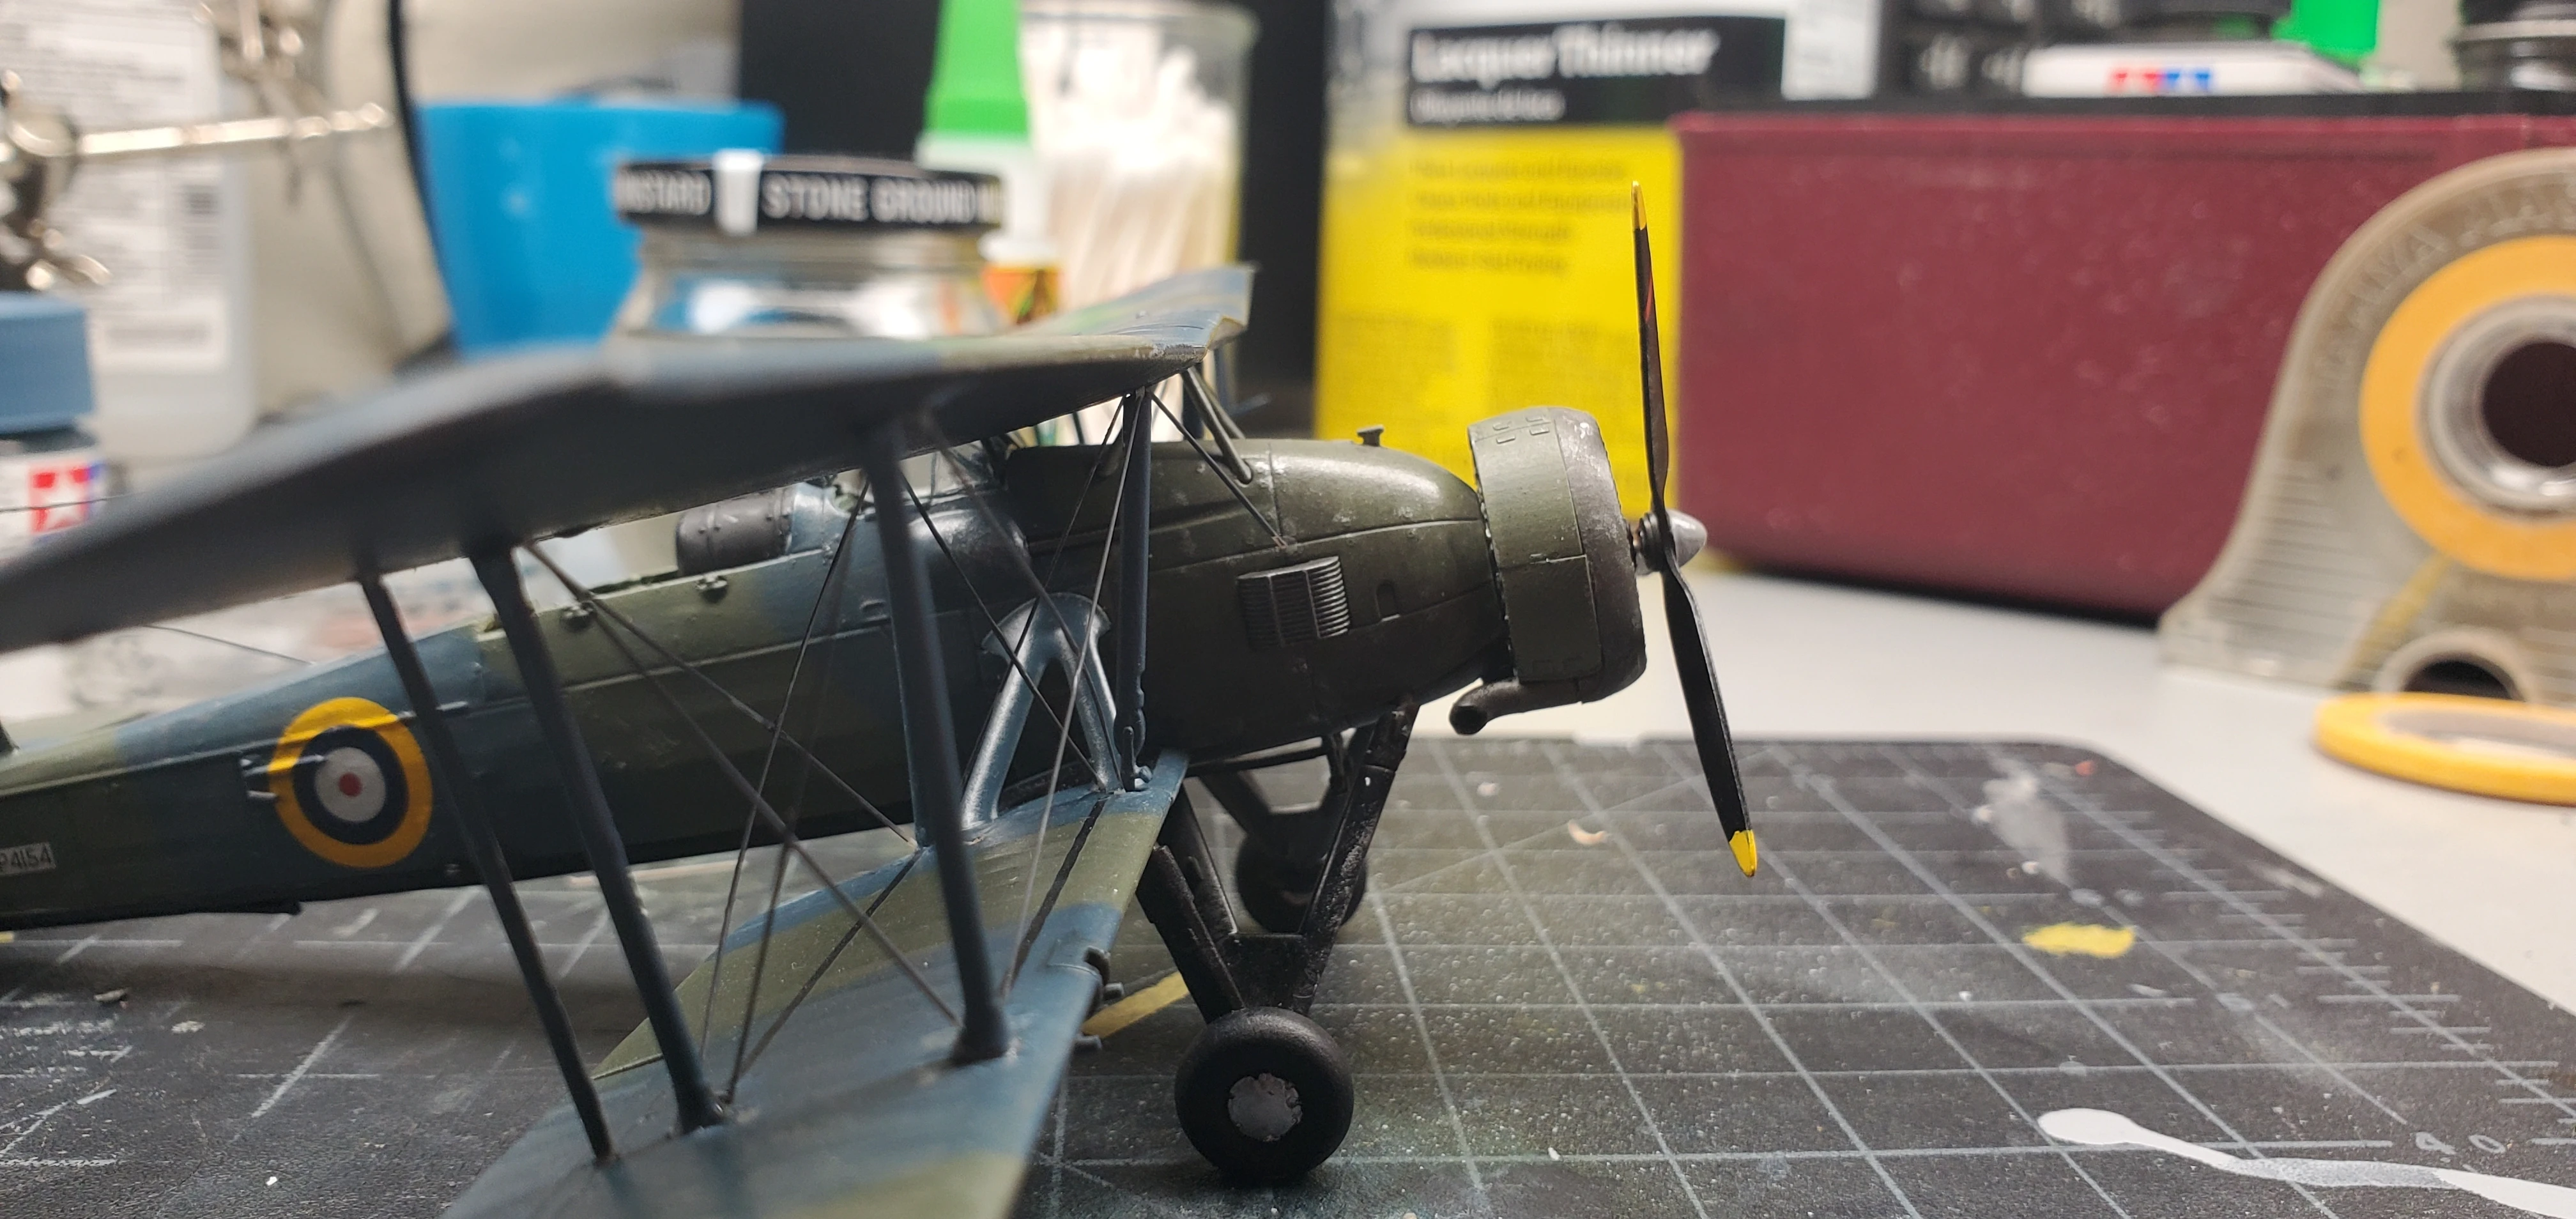
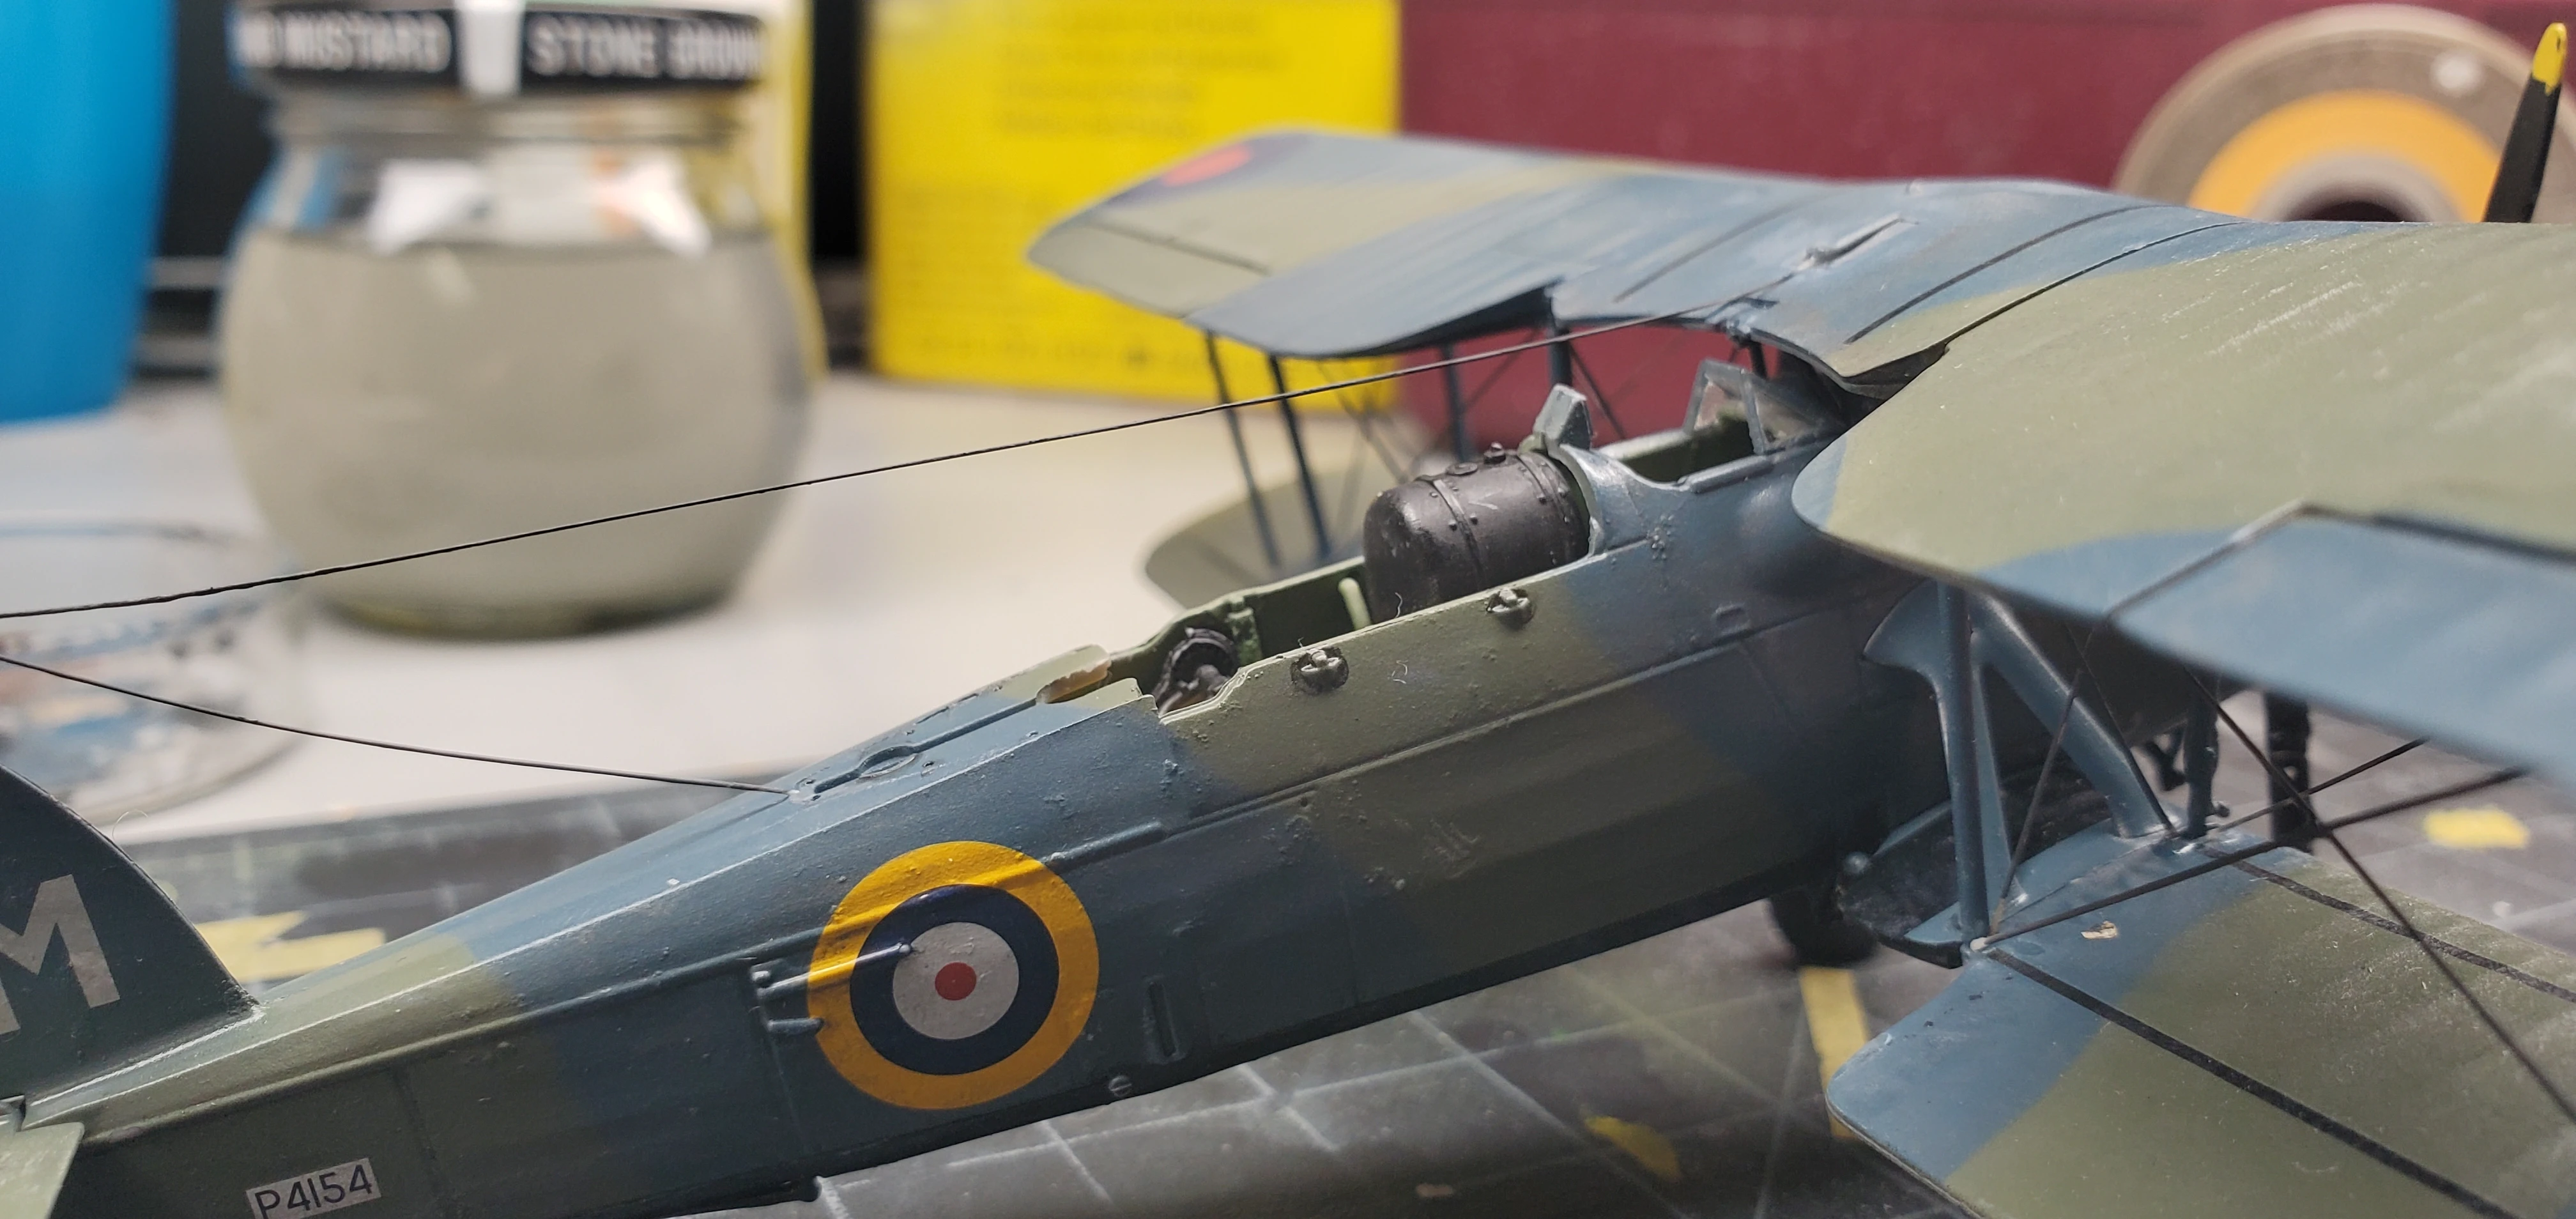
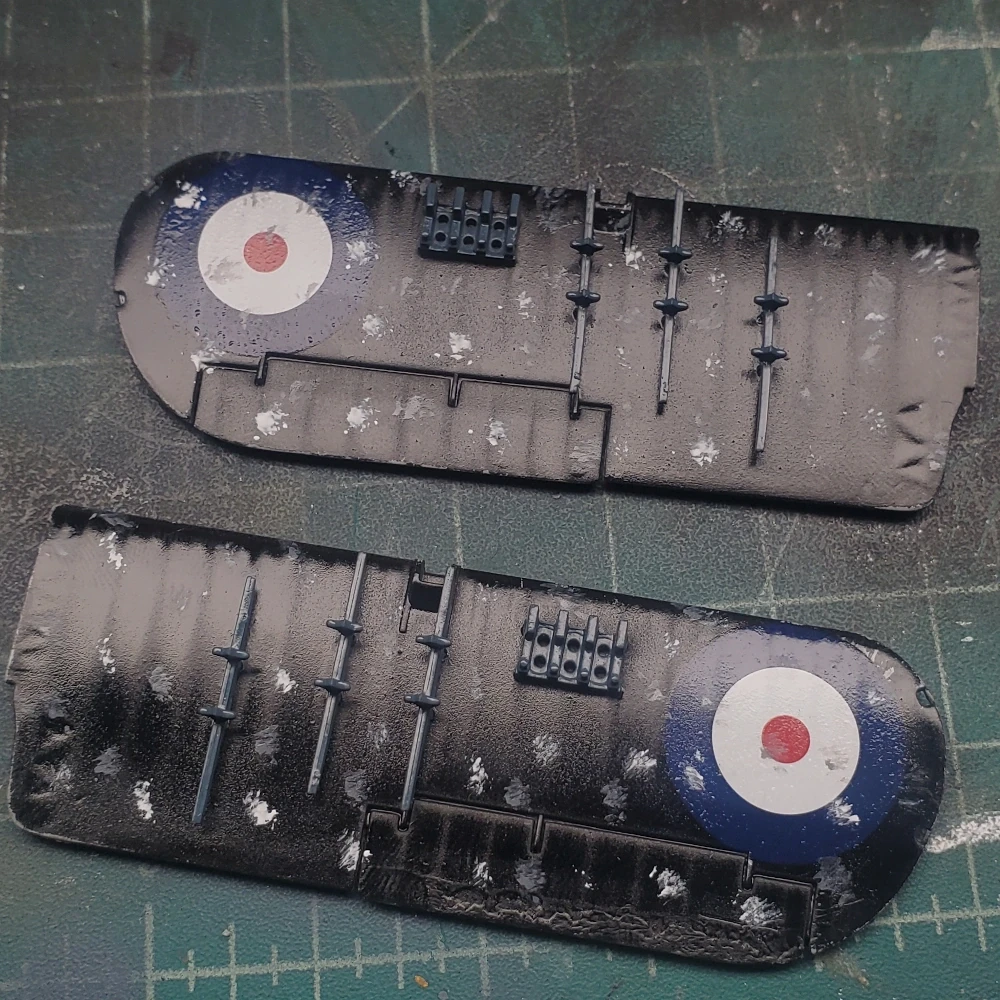
The instructions called for one shade on the top wing and a seperate shade on the bottom. However, I just used the same color for both. It seemed like too much work to try and either buy new colors or mix a different shade. I dont believe it changed the quality of the outcome. To paint on the camo pattern, I lightly drew on the pattern with a pencil. I then just airbrushed the colors on without any sort of masking. After the fact, I realized that a better method would have been to mask off the edges with some sort of putty. I then had to do a few go’s of touching up the edges using play-doh snakes of clay.

Decals
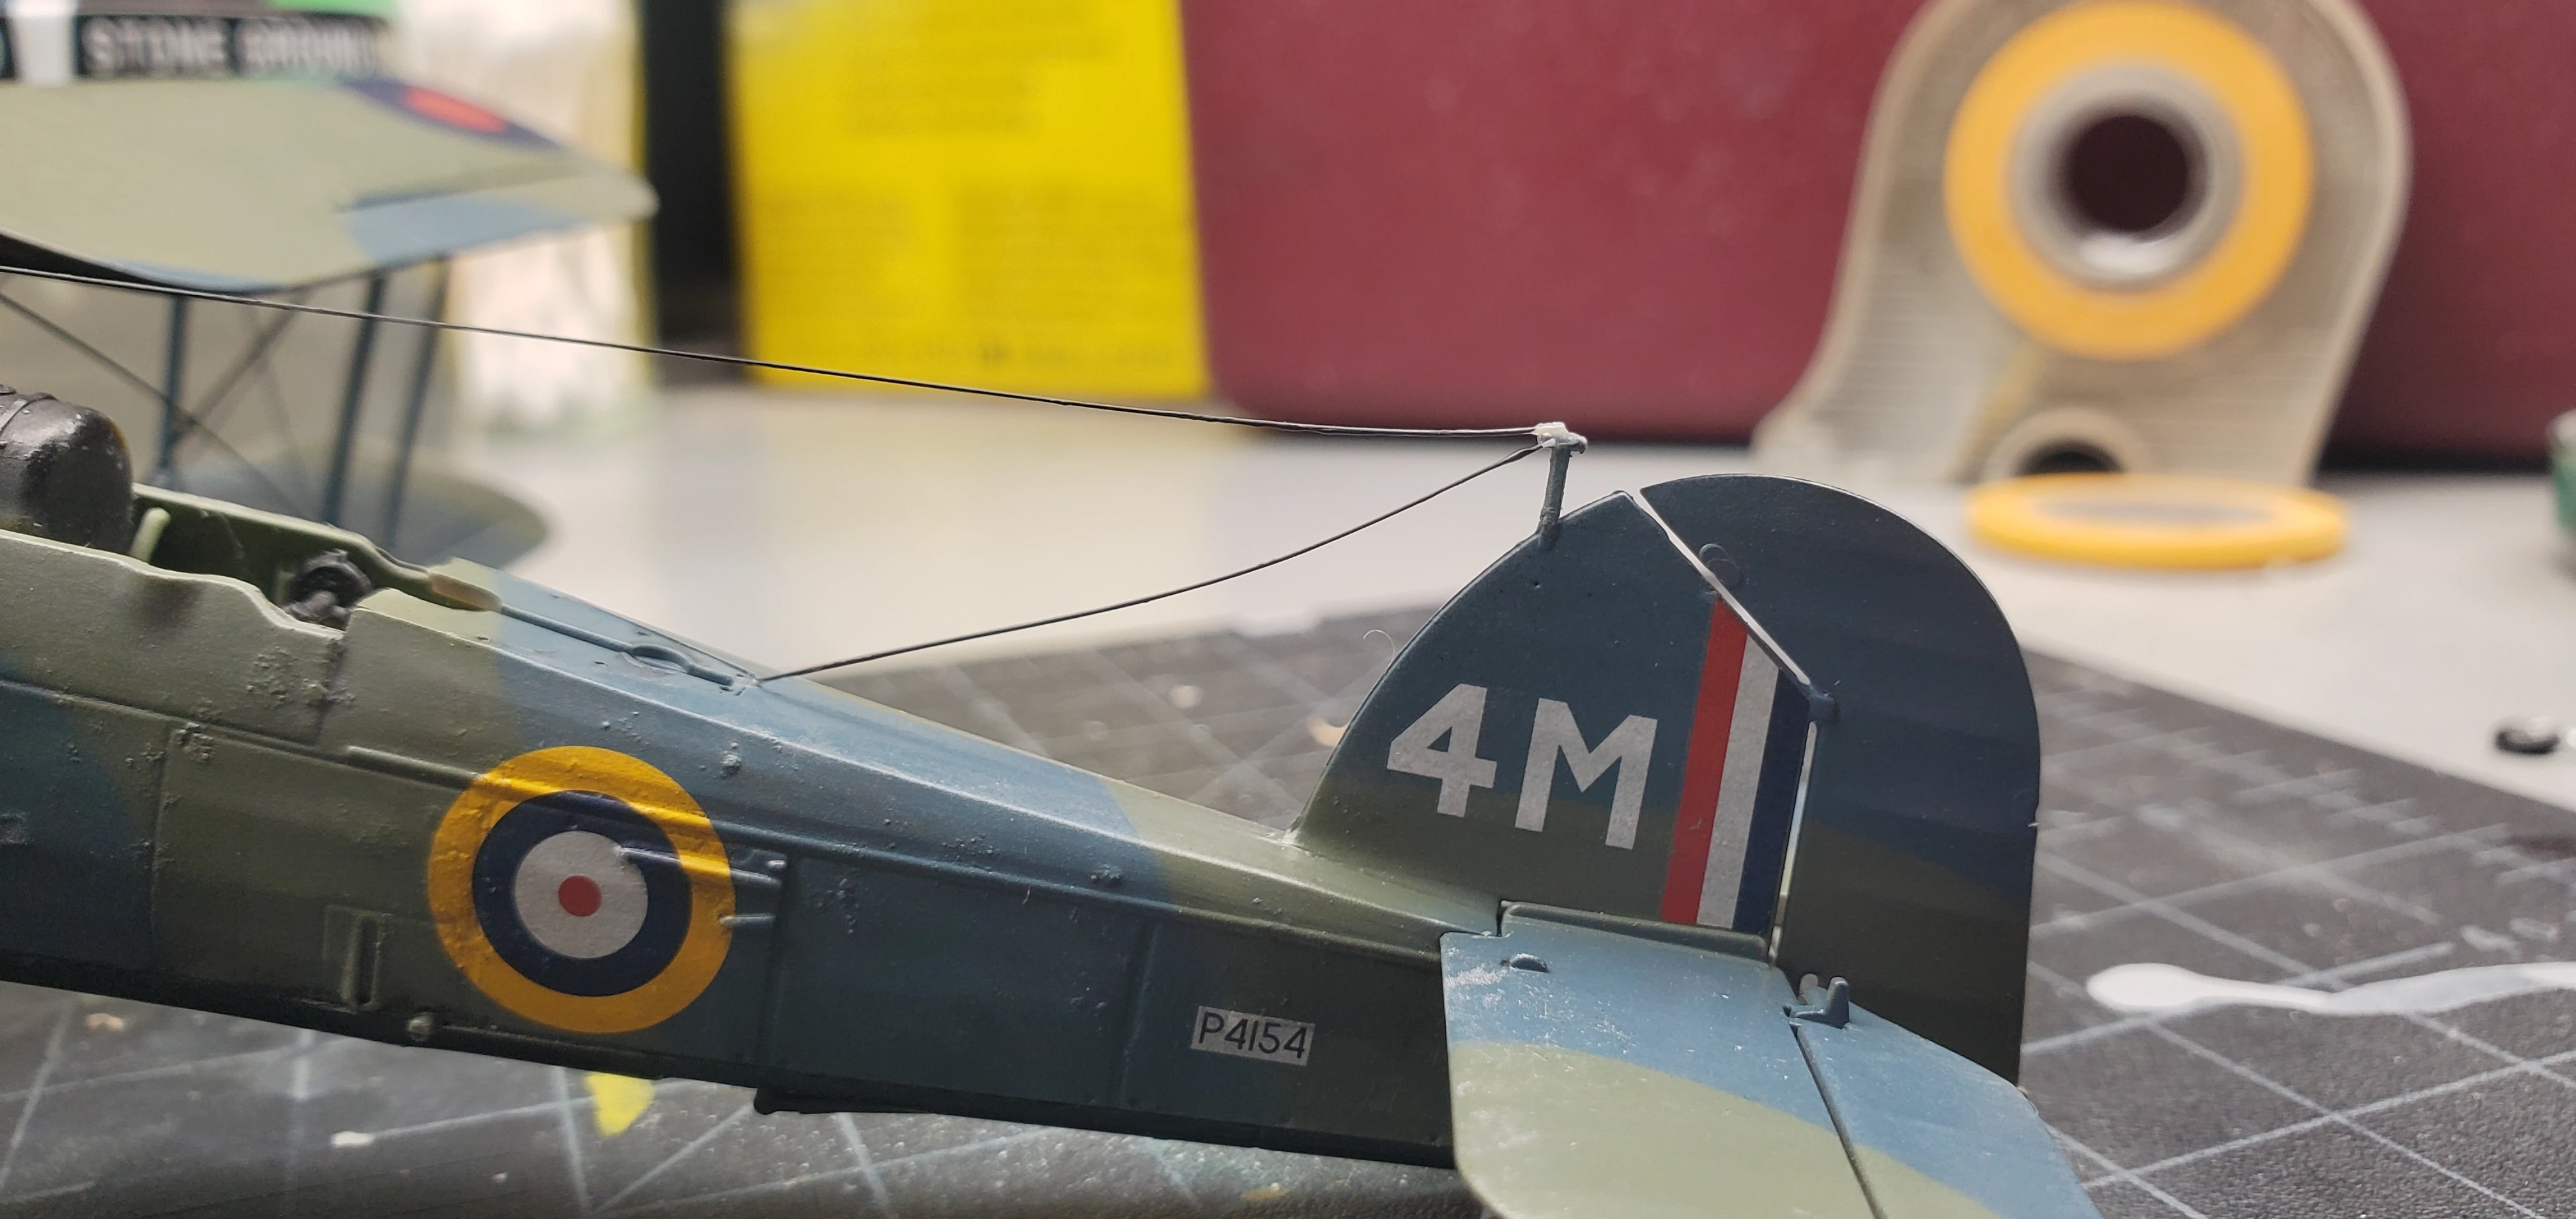
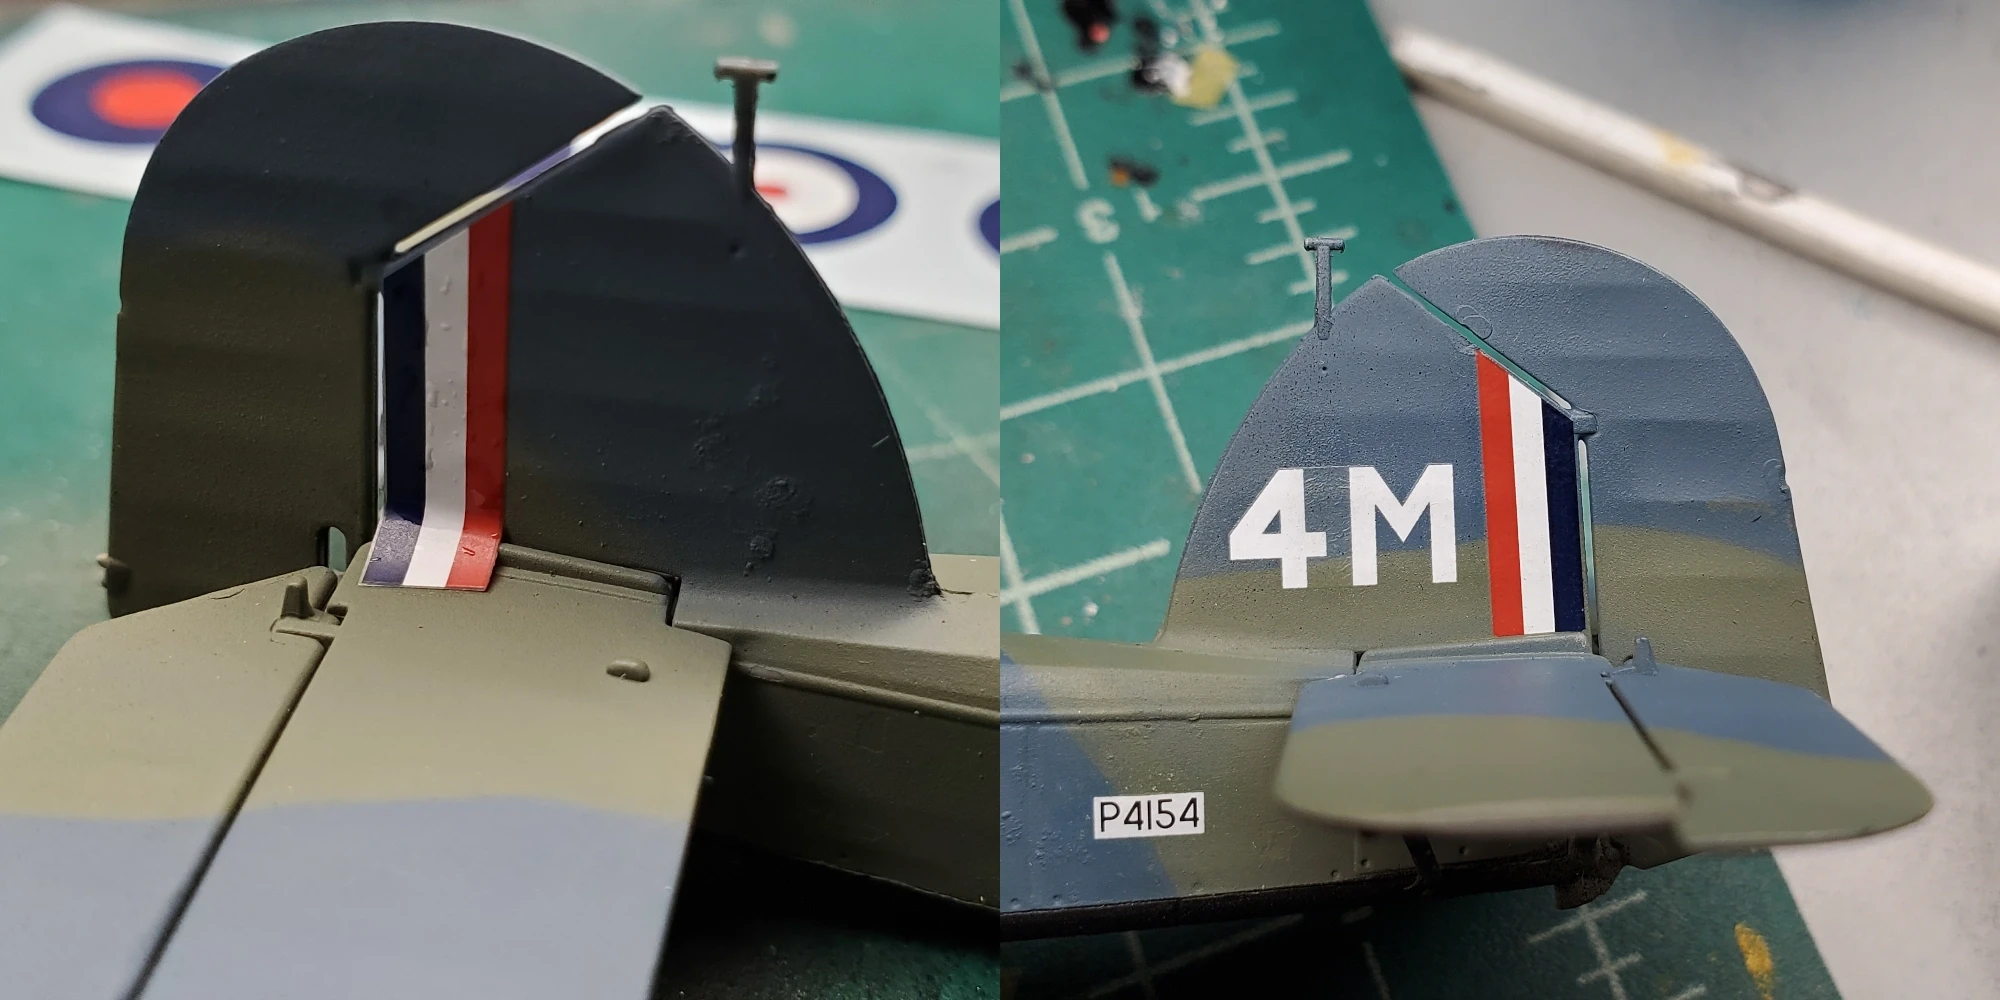
The decals were cartograph decals, which in a previous model I built, which had no problems. Micro Set was put on first, followed by the decal. After a bit, Micro Sol was put on to soften to decal. The decals on the model look great. The yellow roundels on the sides were a bit tricky with their position being on an irregular surface.

The stripes by the rudder seemed to be too long. This might have been because I positioned them too high/low. To solve this problem, I simply cut them off at the bottom.
Weathering(?)
After applying Mr. Hobby Top Coat Gloss over the whole model, I started to add weathering. I applied a little bit of Tamiya Panel Line Accent Wash to the very few places where it could be realistically applied. Then, I tried a little different method. I heard that you can use oil paints for a dot filter to add color irregularity to the surface. I did not have any oil paints, so I tried using enamel paints to hopefully create a similar effect. A various selection of colors were chosen and put onto the model. Paint thinner blended the colors together. The enaml dot filter didn’t give the same effect I’d imagine oil paints would, but it gave the model a little bit of subtle weathering.
Top Coat + Rigging
I did not have any sort of “hobby-grade” matt top coat to finish off the model, so I used rustoleom matt enamel. For fear of turning it into my P-51D that turned into a mess due to this enamel, I only put a little bit on. However, it did not give the matt finish I would have hoped for. In the future, I will spray on something different through my airbrush.
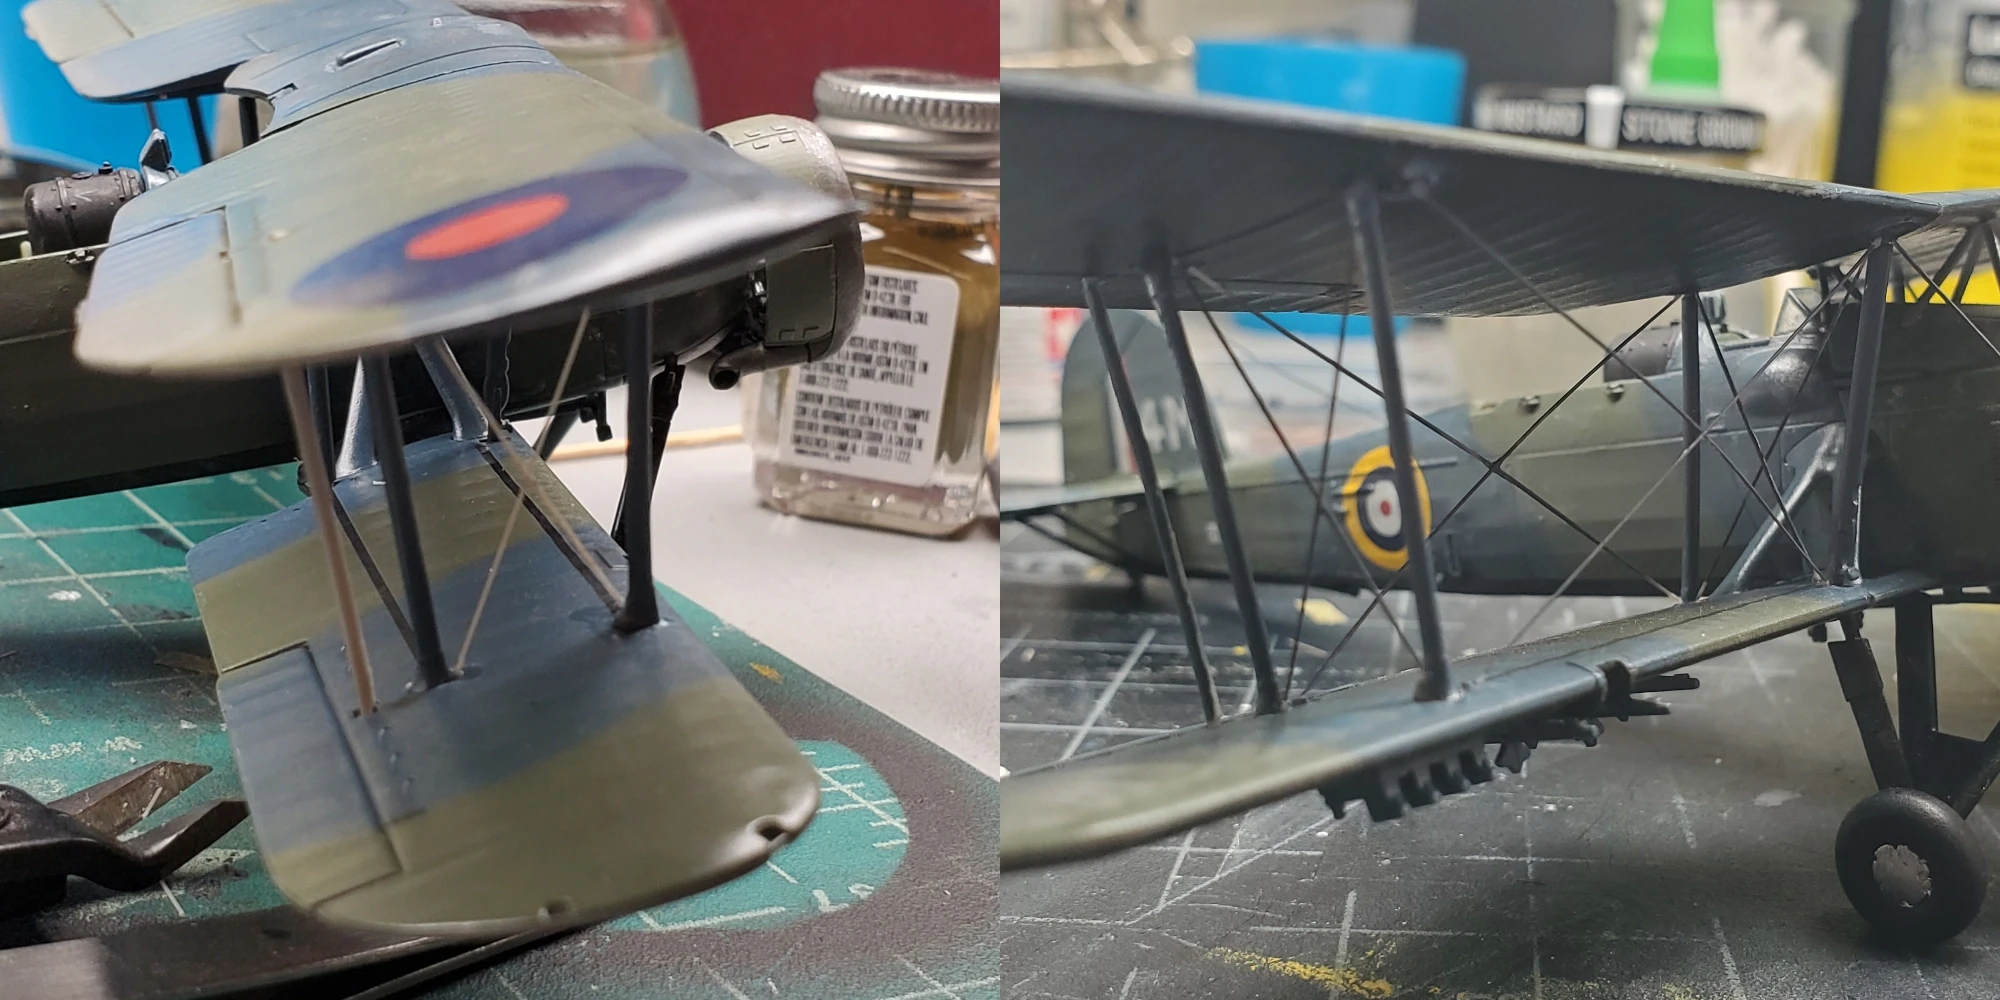
The final step was rigging of the wings that hold the plane together. Rigging sets are available, but there is another method to accomplish rigging, which is through using spare plastic sprue. To do this, I took spare sprue-plastic and melted part of it using a lighter. Once it was properly softened, I pulled it apart, producing a thin line of plastic. It was then cut into an approximate length and glued one side on. Little by little, I’d cut off bits until it matched the size before gluing it in place. This was repeated numerous times. After everything was in place, I didn’t know what color these strings should be, so I just used German Gray: XF-63.
Conclusion
I am proud of what this model looks like once completed. Getting all the parts to be aligned when gluing was a challenge, but I don’t think any mis-aligned parts are noticable in the end. Rigging was another tricky task but I learned a lot from doing it. I like the look of bi-planes, so seeing this thing come together was a nice experience.